Upload Your Managed Package
In order to get the most out of some of the exercises that come later in this workbook, you will need to upload a Managed Release version of your (very) simple managed package.
In this exercise, you will…
- Open the “Upload Package” screen
- Define package version details and upload your package
- Wait for your package upload to complete successfully
- Verify the settings and content of your managed package
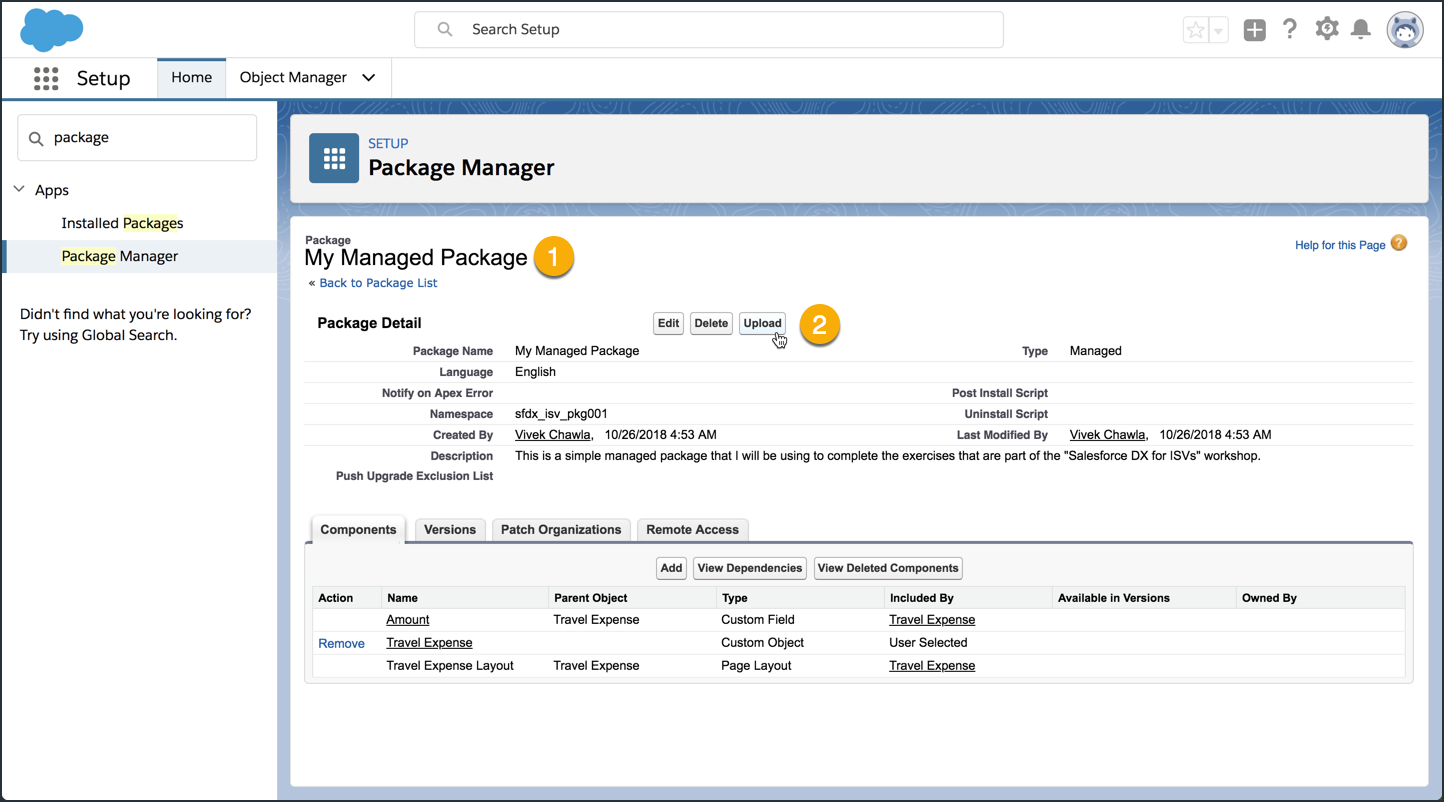
Open the “Upload Package” screen
- Make sure you’re on the setup page for your managed package (eg. My Managed Package in our examples).
- Click the Upload button.
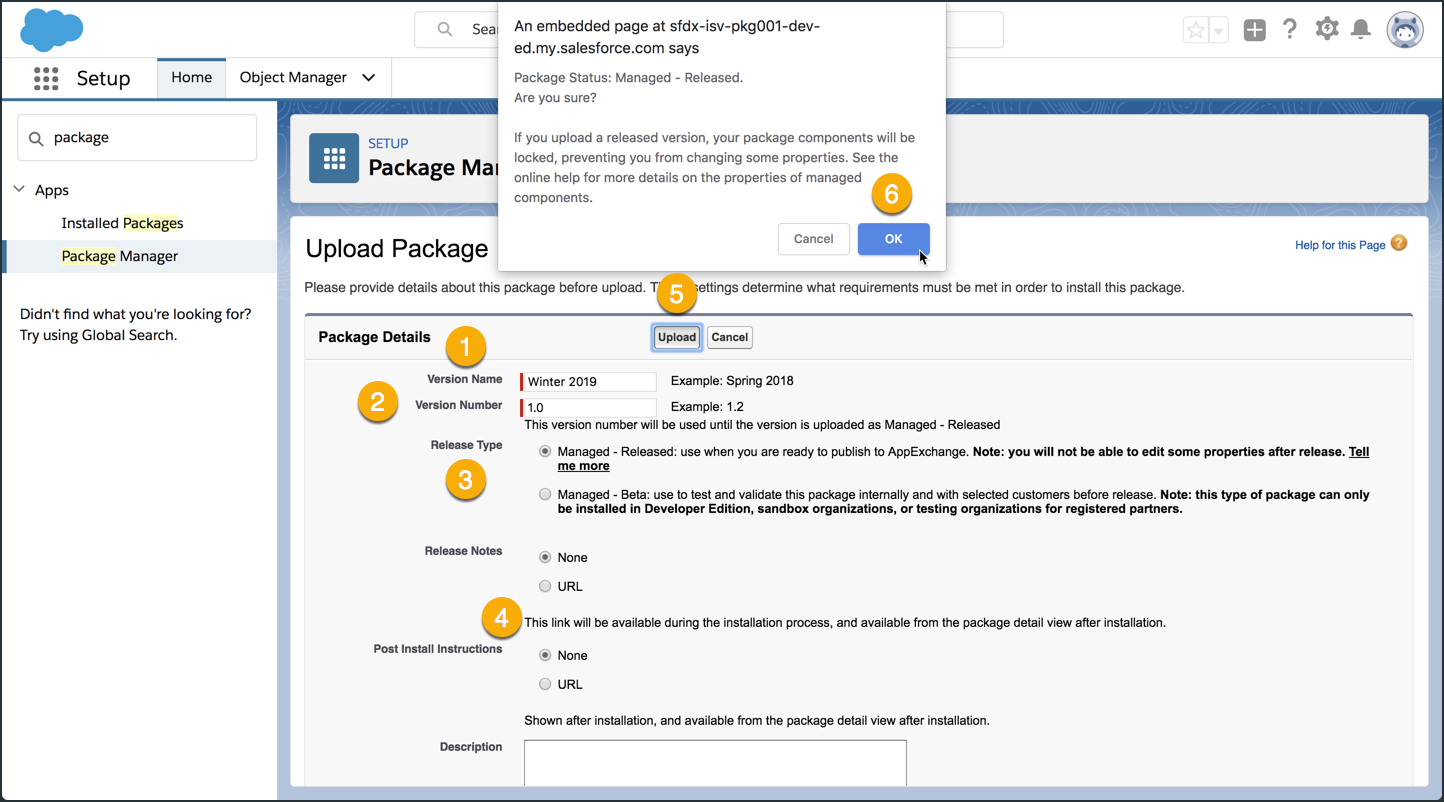
Define package version details and upload your package
On the Upload Package screen, take the following steps.
- Set Version Name to
Winter 2019. - Set Version Number to
1.0. - Set Release Type to Managed - Released.
- Keep the defaults for Release Notes and Post Install Instructions (None and None)
- Click the Upload button.
- On the confirmation dialog that follows, click OK.
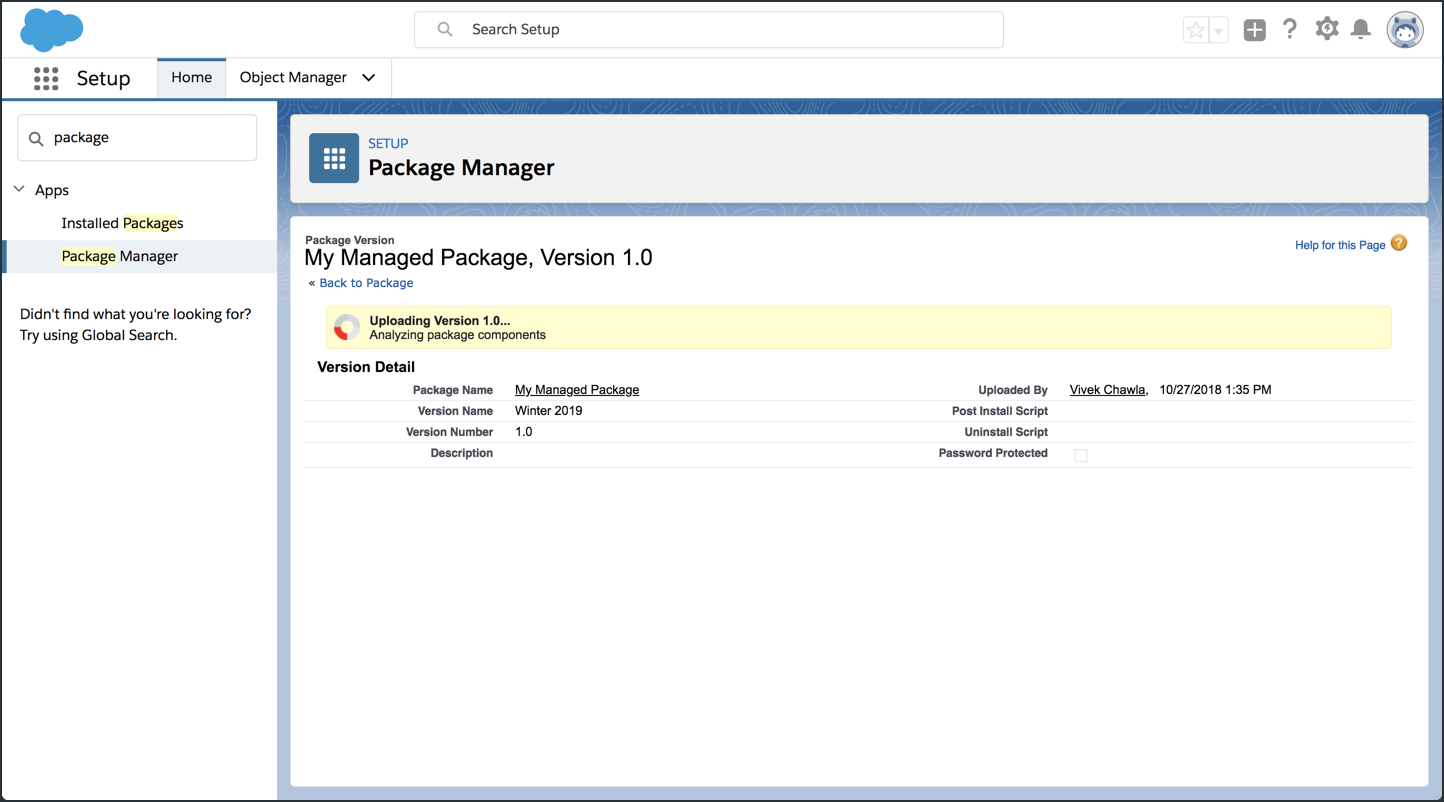
Wait for your upload to complete successfully
While your package is uploading, your screen should look something like this:
Once your package upload is complete, your screen should look something like this:
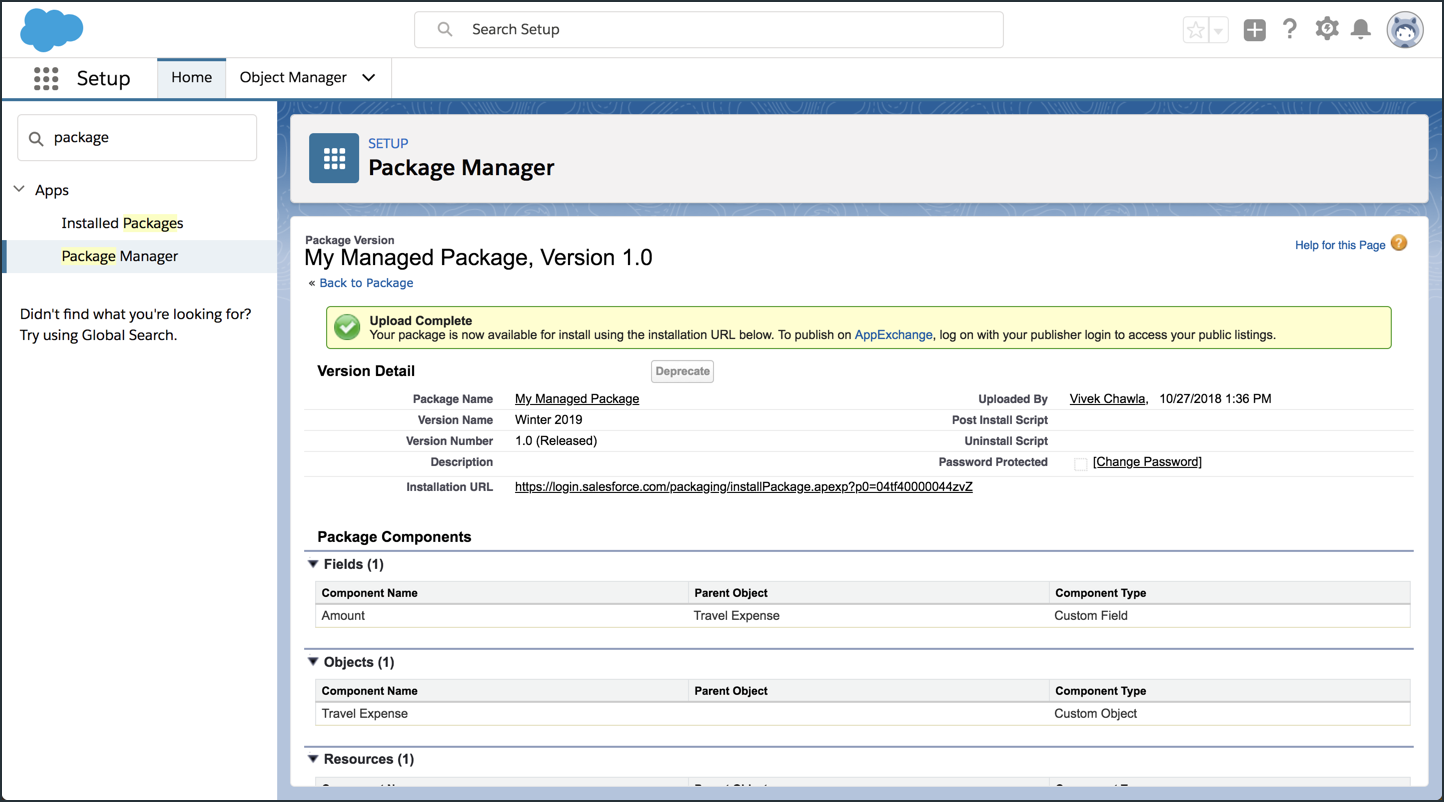
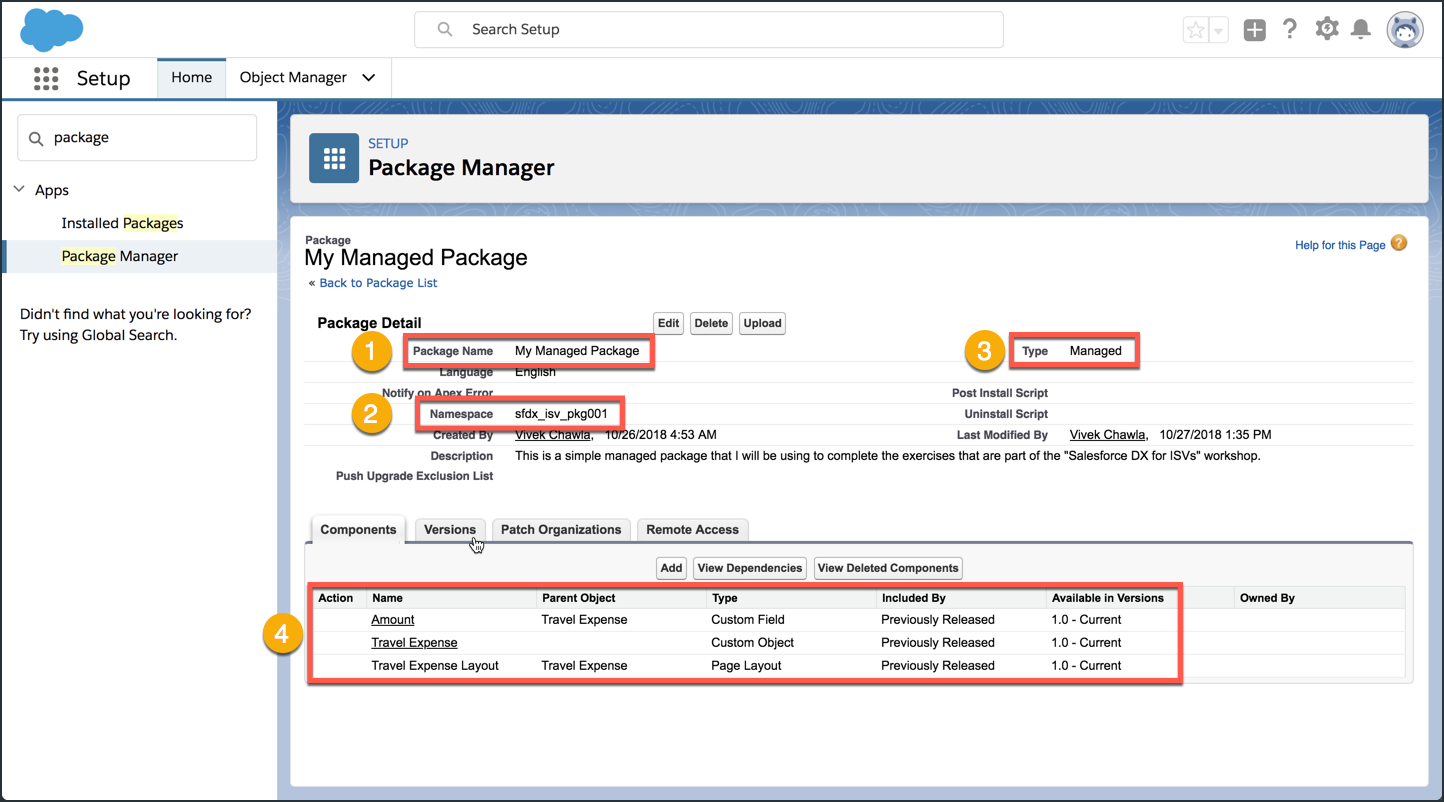
Verify the settings and content of your managed package
- Name of your package (make a note of this!)
- Package Namespace (make a note of this!)
- Confirm that it’s a managed package.
- Confirm that you have the three metadata components shown.