Test the Installation of Your Package
In this exercise, you will…
- Create a new scratch org (
PkgTest) to use as an install target for your Managed Beta package - Use the CLI to install your Managed Beta package in your
PkgTestscratch org - Use the CLI to assign the
Travel_Expenses_Userpermission set to your scratch org user - Open your
PkgTestscratch org to see the Travel Expenses App in action
Create a new scratch org (PkgTest) to use as an install target for your Managed Beta package
Warning: This version of force:org:create is slightly different from the other ones you’ve used. This time, you’re adding the -n (--nonamespace) flag to prevent this scratch org from being created as a Namespaced Scratch org.
If you forget to add this flag, you’ll get an error when you try to install your managed package because the package’s namespace would be in conflict with the namespace being used by the scratch org.
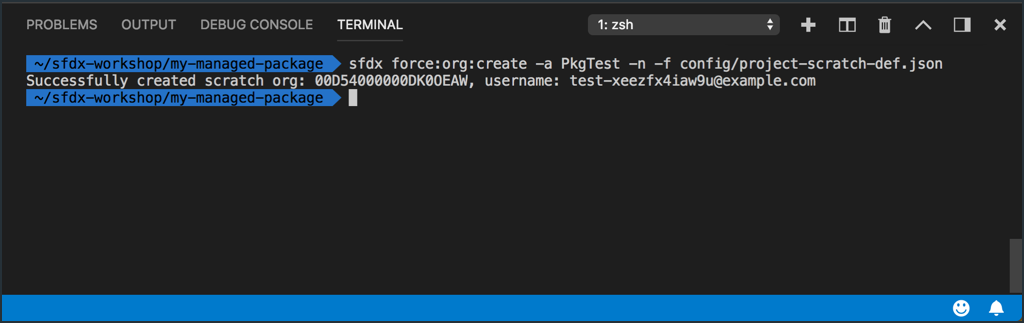
Execute this command:
sfdx force:org:create -a PkgTest -n -f config/project-scratch-def.json
| Salesforce DX Command / Flags | Description |
|---|---|
force:org:create |
Description TBA |
-a (--setalias) |
Sets an alias for for the created scratch org. |
-n (--nonamespace) |
Creates the scratch org with no namespace. Useful when using a scratch org to test installations of packages with namespaces. |
-f (--definitionfile) |
Path to a scratch org definition file. |
After executing the above, your terminal should look something like this:
Use the CLI to install your Managed Beta package in your PkgTest scratch org
Your’re ready to install your Managed-Beta package version in your new PkgTest scratch org, but to do so you’ll need to know the Package Version ID. Luckily, you can get this from another call to force:package1:version:list.
Step 1 of 2: Use force:package1:version:list to get the Package Version ID of your Managed Beta package
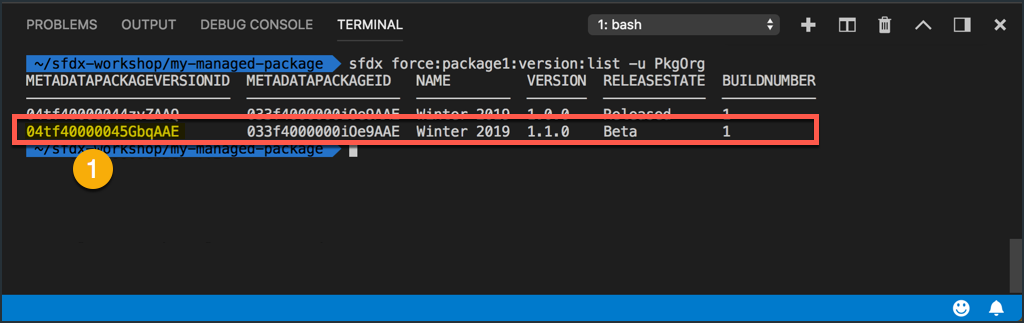
Execute this command:
sfdx force:package1:version:list -u PkgOrg
| Salesforce DX Command / Flags | Description |
|---|---|
force:package1:version:list |
Lists the versions for the specified package or all first-generation packages in the org. |
-u (--targetusername) |
A username or alias for the target org. Overrides the default target org. |
After executing the above, your terminal should look something like this:
- Make note of the
METADATAPACKAGEVERSIONIDvalue for the v1.1.0 Beta package.
Step 2 of 2: Use force:package:install to install your package into the PkgTest org
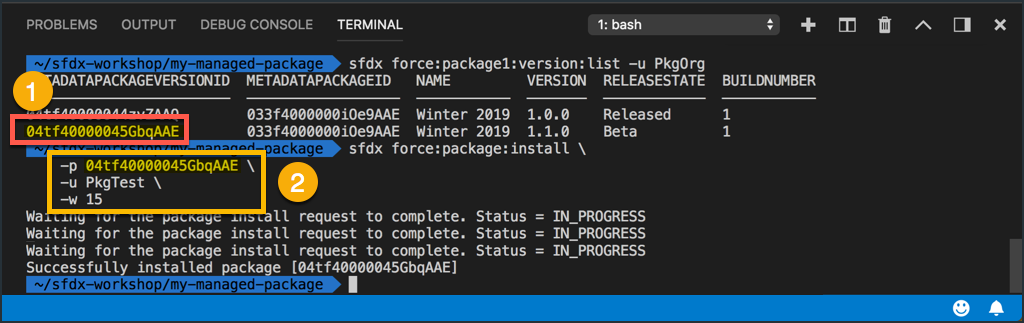
Execute this command:
sfdx force:package:install \
    -p YOUR_04t_PACKAGE_VERSION_ID \
    -u PkgTest \
    -w 15
| Salesforce DX Command / Flags | Description |
|---|---|
force:package:install |
Installs a package in the target org. |
-p (--package) |
The ID (starts with 04t) or alias of the package version to install. |
-u (--targetusername) |
A username or alias for the target org. Overrides the default target org. |
-w (--wait) |
Maximum number of minutes to wait for installation status. The default is 0. |
After executing the above, your terminal should look something like this:
- The Package Version ID from the
force:package1:version:listcommand is copied… - And is pasted into the
force:package:installcommand.
Use the CLI to assign the “Travel Expenses User” permission set to your scratch org user
The CLI can do more than just deploy/retrieve and push/pull metadata. You can also do things like assign permission sets via the CLI.
Step 1 of 2: Determine the API name of the “Travel Expenses User” permission set
- Look at the name of the metadata file for the Travel Expenses User permission set.
- You’ll use the first half (everything to the left of
.permissionset) in your next command.
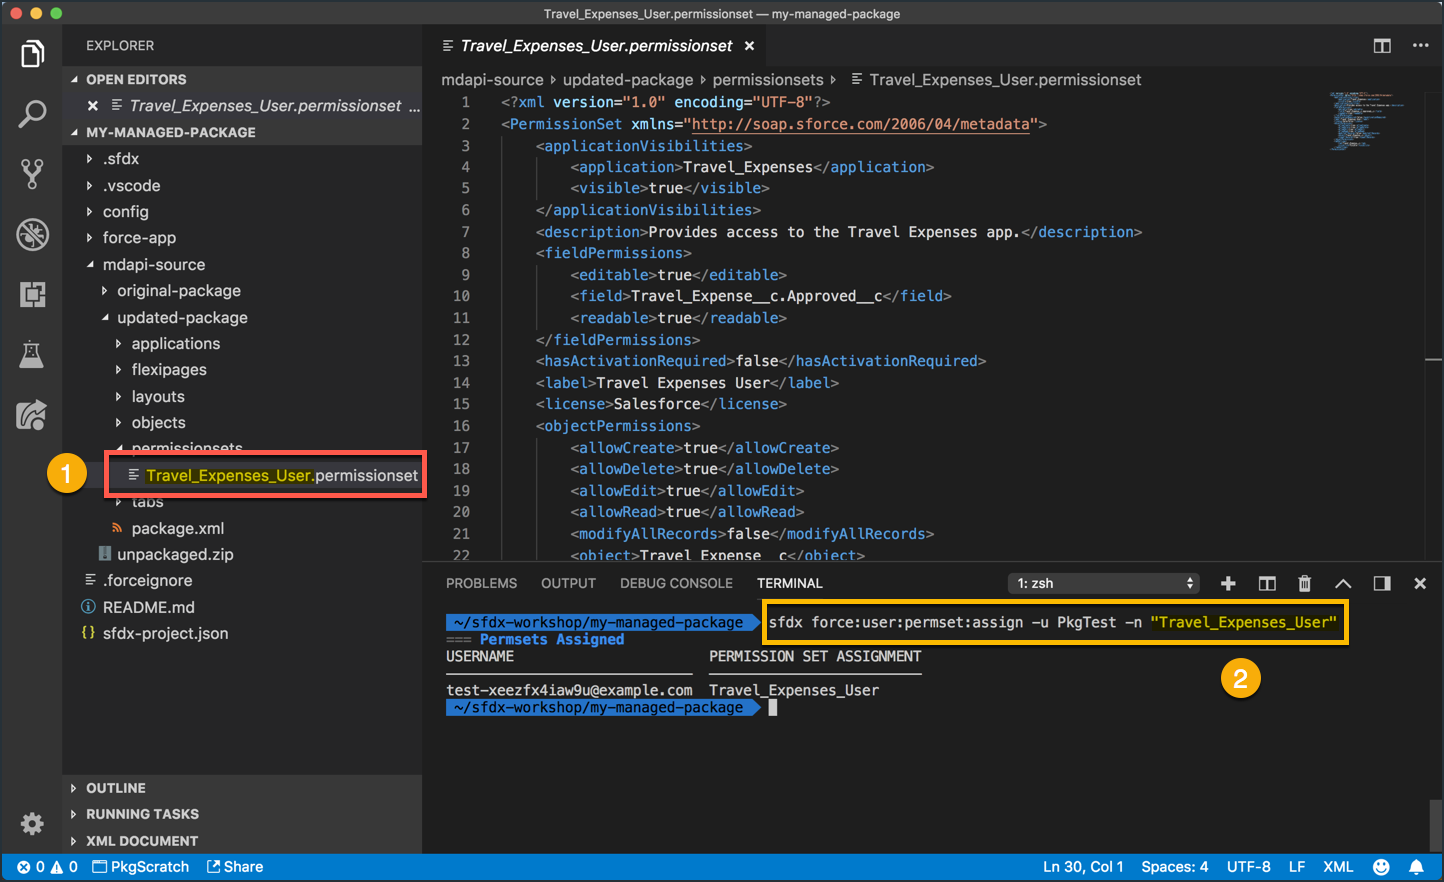
Step 2 of 2: Use force:user:permset:assign to assign the permission set
Execute this command:
sfdx force:user:permset:assign -u PkgTest -n "Travel_Expenses_User"
| Salesforce DX Command / Flags | Description |
|---|---|
force:user:permset:assign |
Assigns a named permission set to one or more users of an org. |
-u (--targetusername) |
A username or alias for the target org. Overrides the default target org. |
-n (--permsetname) |
The name of the permission set to assign. |
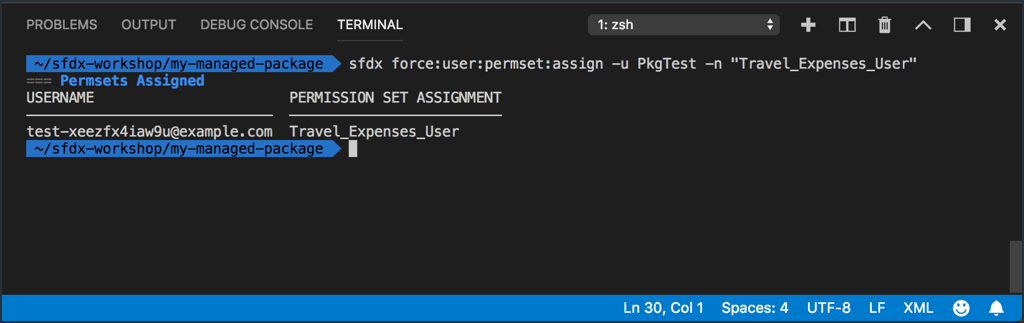
After executing the above, your terminal should look something like this:
Open your PkgTest scratch org to see the Travel Expenses App in action
Step 1 of 3: Execute this command
sfdx force:org:open -u PkgTest
| Salesforce DX Command / Flags | Description |
|---|---|
force:org:open |
Opens an org in your browser. |
-u (--targetusername) |
A username or alias for the target org. Overrides the default target org. |
After executing the above, your default browser will automatically open to the PkgTest scratch org and your terminal should look something like this:

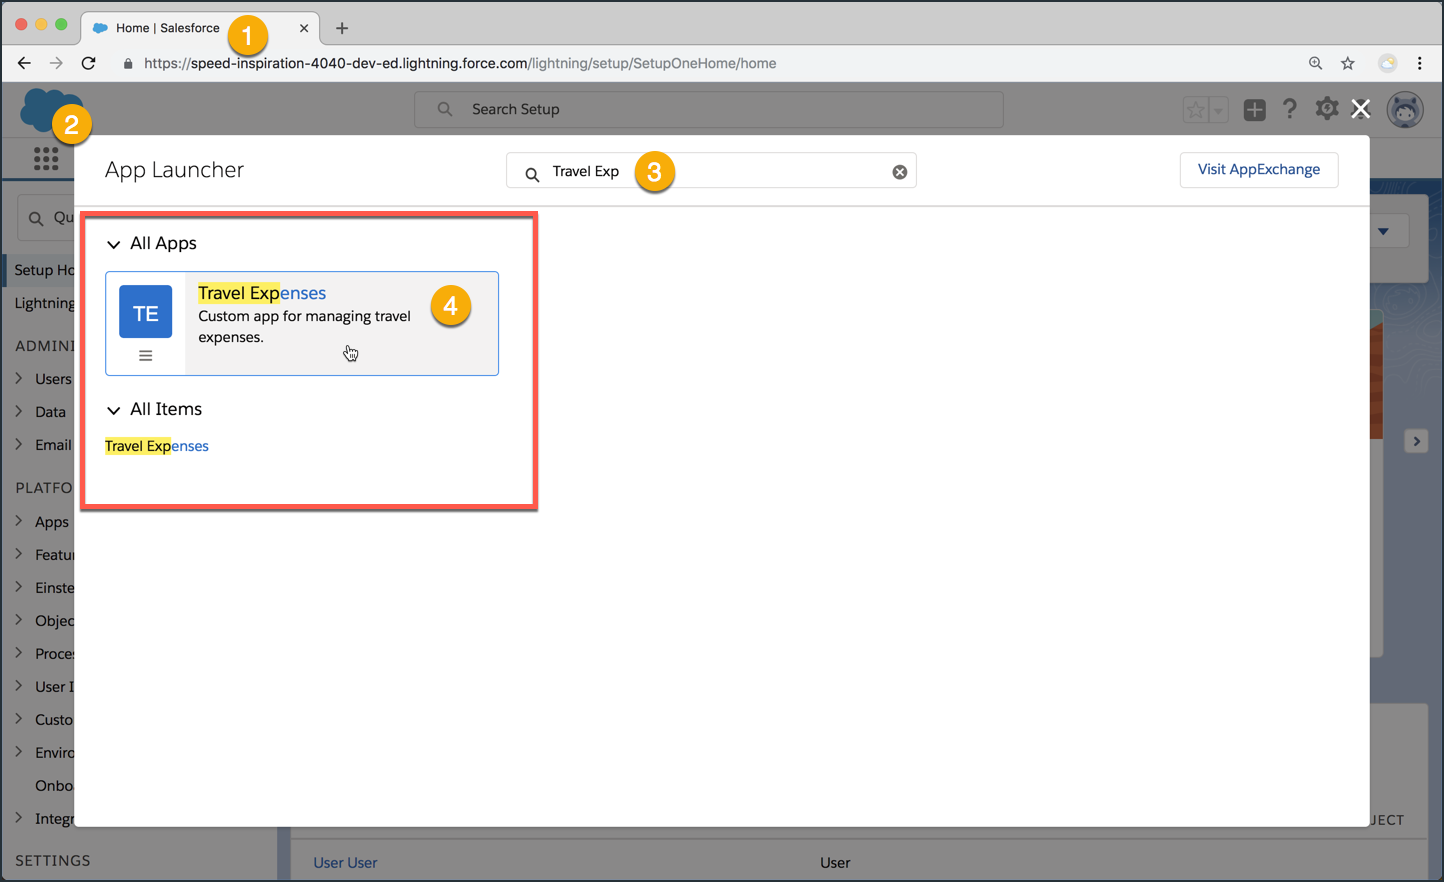
Step 2 of 3: From inside your PkgTest scratch org, launch the “Travel Expenses” app
- Verify that you’re in the PkgTest org.
- Open the App Launcher.
- Type “Travel Exp” in the search box.
- Click on the Travel Expenses app.
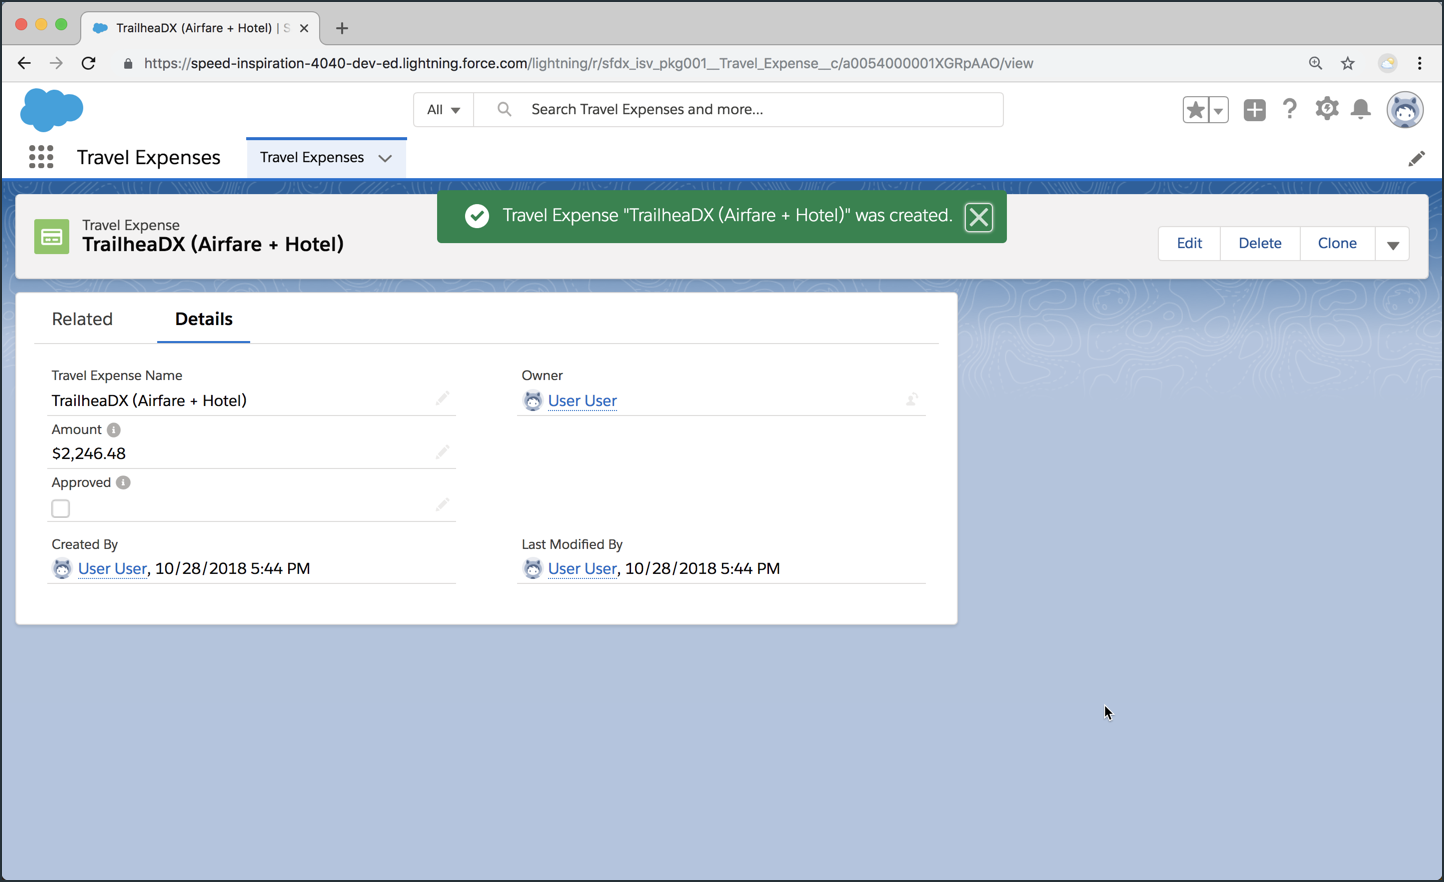
Step 3 of 3: Create a Travel Expense Record
From here, go ahead and add a new Travel Expense record to prove that everything works. Remember, this is not local code. It’s a managed package that you installed in the org, just like an ISV would do.