Create a Permission Set for Your App
In this exercise, you will…
- Create a “Travel Expenses User” permission set
- Set object and application perms on the “Travel Expenses User” permission set
- Assign the “Travel Expenses User” permission set to the admin user
Create a “Travel Expenses User” permission set
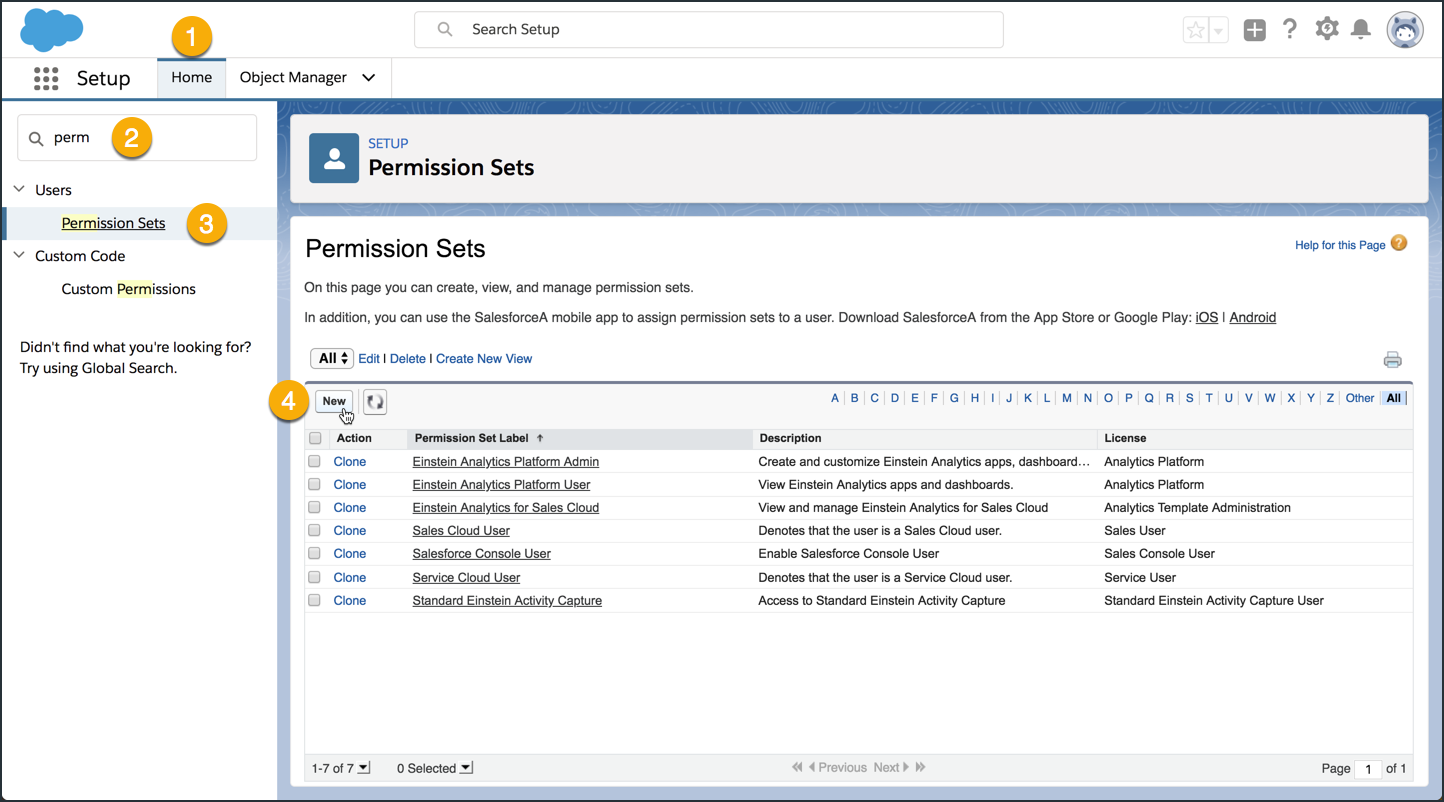
Step 1 of 2: Use Setup to create a new permission set
- From Setup, click the Home tab.
- Type “perm” into the Quick Find search box.
- Click the Permission Sets menu item.
- Click the New button at the top of the list of Permission Sets.
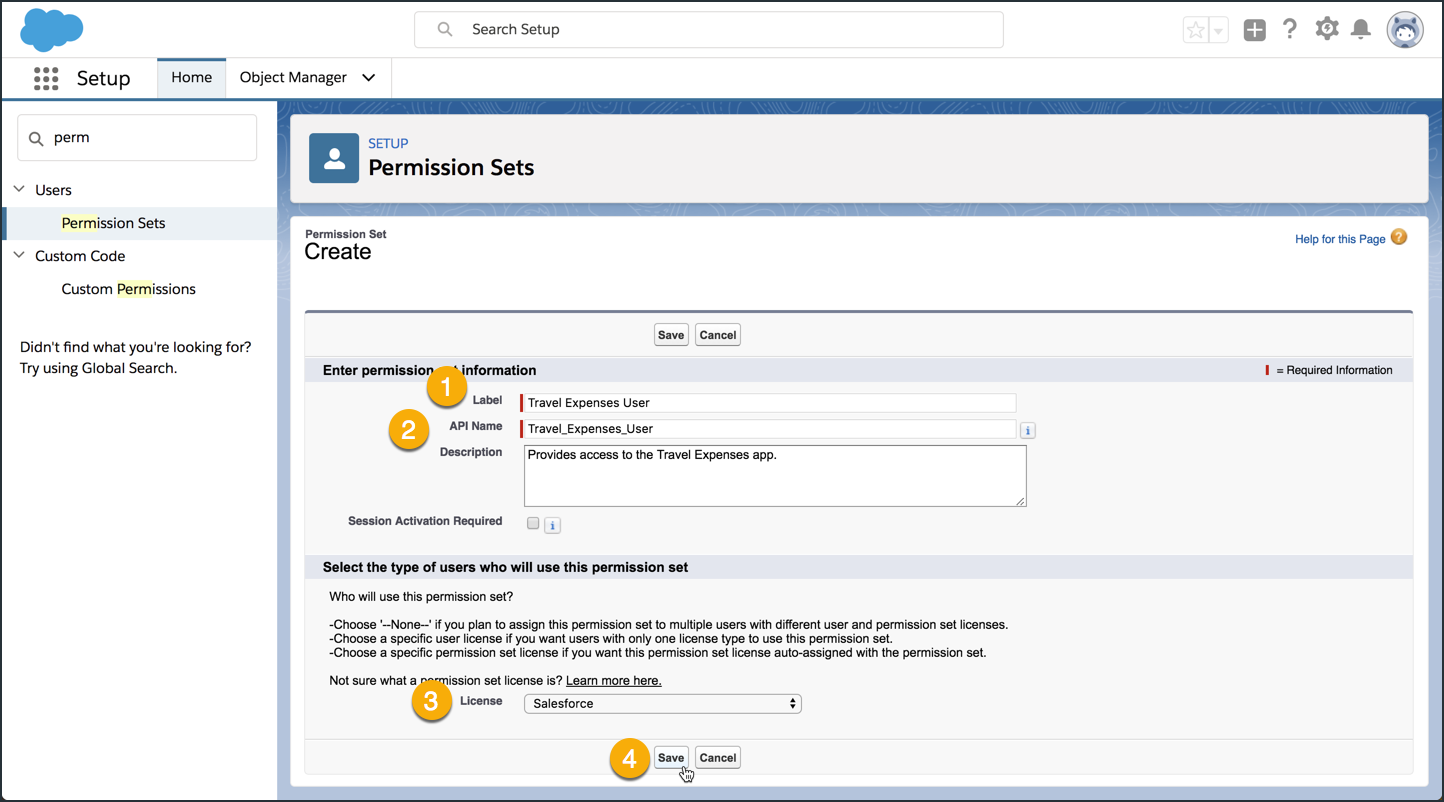
Step 2 of 2: Enter permission set information
- Set the Label to
Travel Expenses User. - Set the API Name to
Travel_Expenses_User. - Set the License to Salesforce.
- Click Save to continue.
Set object and application perms on the “Travel Expenses User” permission set
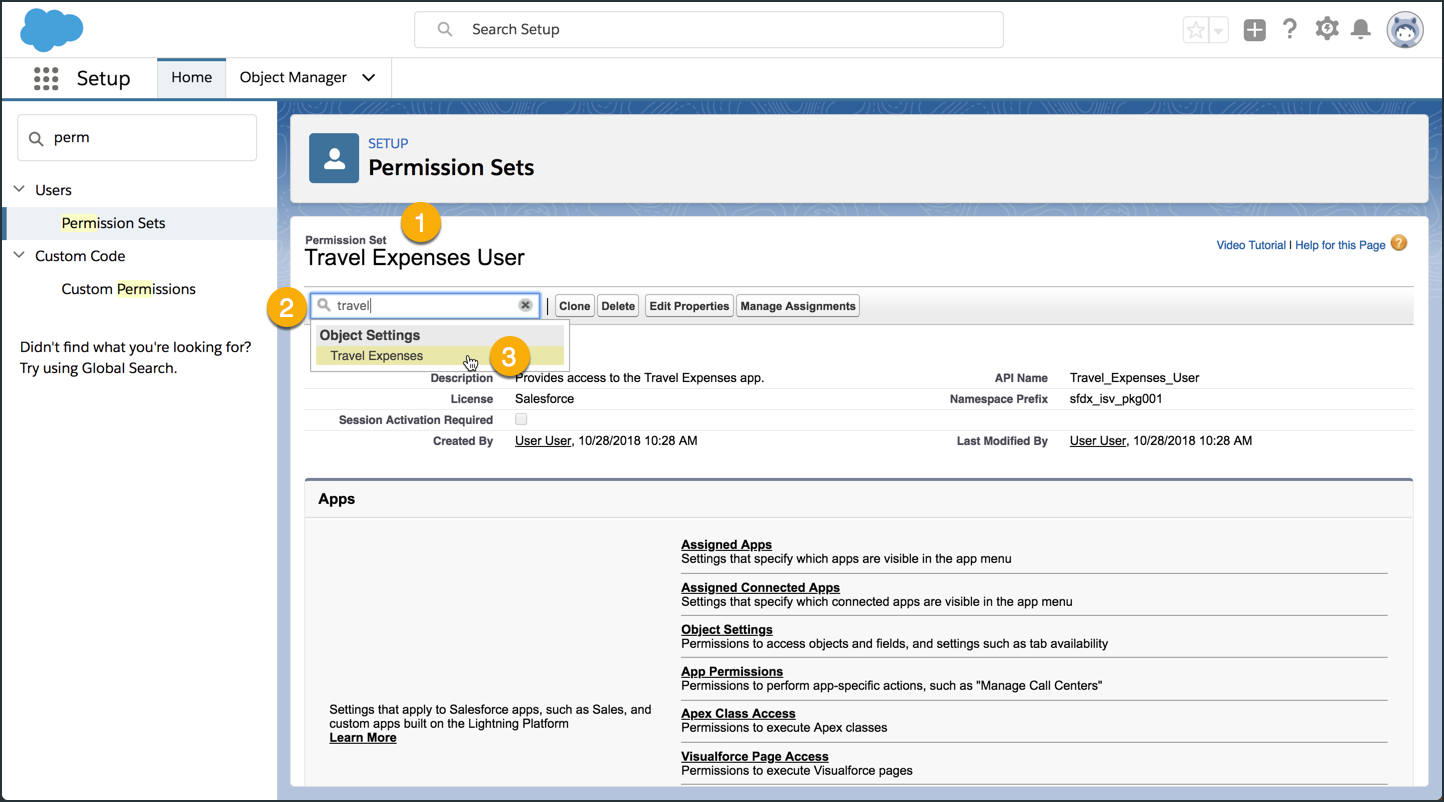
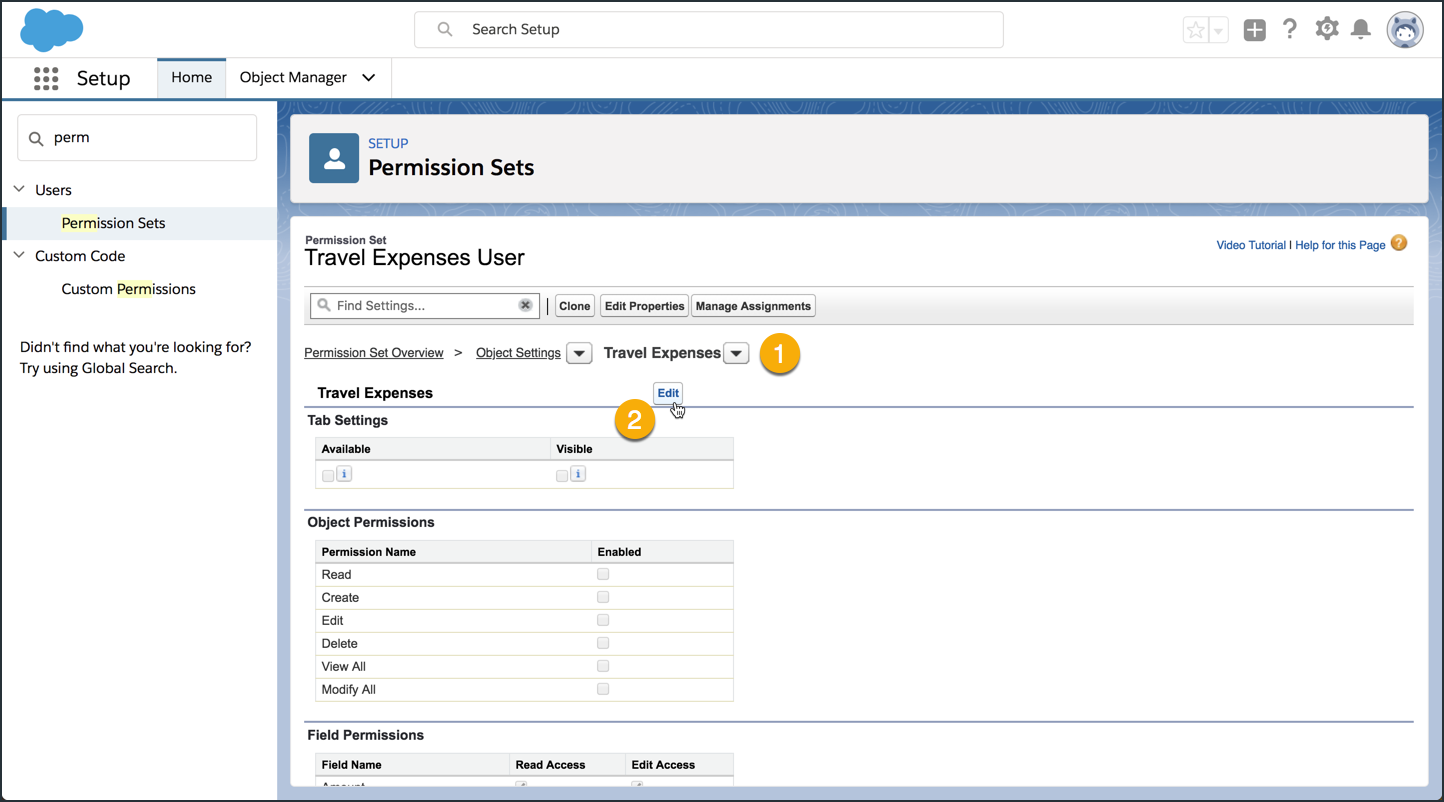
Step 1 of 6: Open object settings page for “Travel Expenses”
- Make sure you’re onside of the setup page for the Travel Expenses User permission set.
- Type “travel” into the search box.
- Click the Travel Expenses menu item.
Step 2 of 6: Edit object settings for “Travel Expenses
- Make sure you’re in the Travel Expenses object settings.
- Click the Edit button.
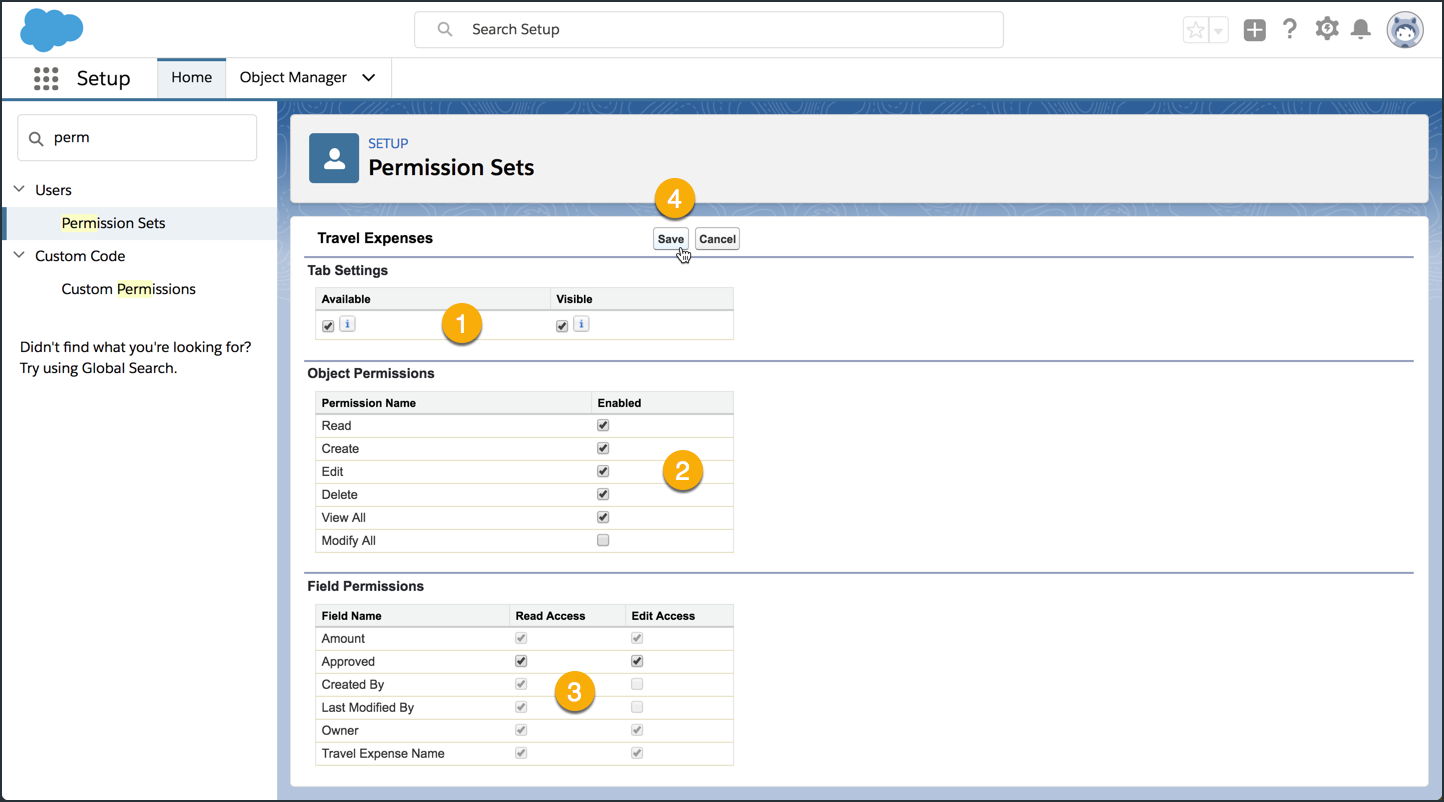
Step 3 of 6: Specify tab settings, object permissions, and field permissions for “Travel Expenses”
- Make sure that Tab Settings Available and Visible are set.
- Make sure all Object Perms are set, except “Modify All”.
- Check all possible Field Permissions.
- Click Save to continue.
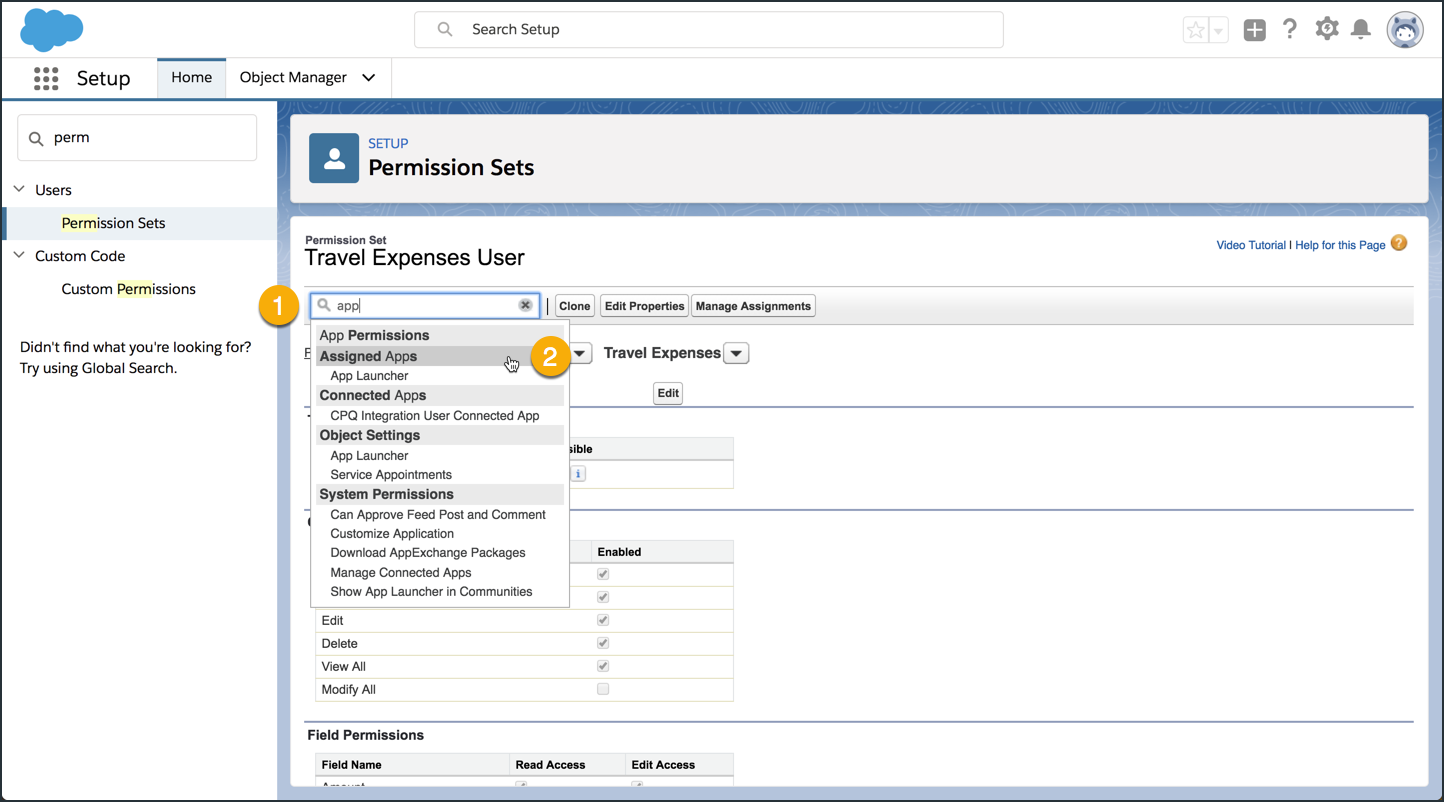
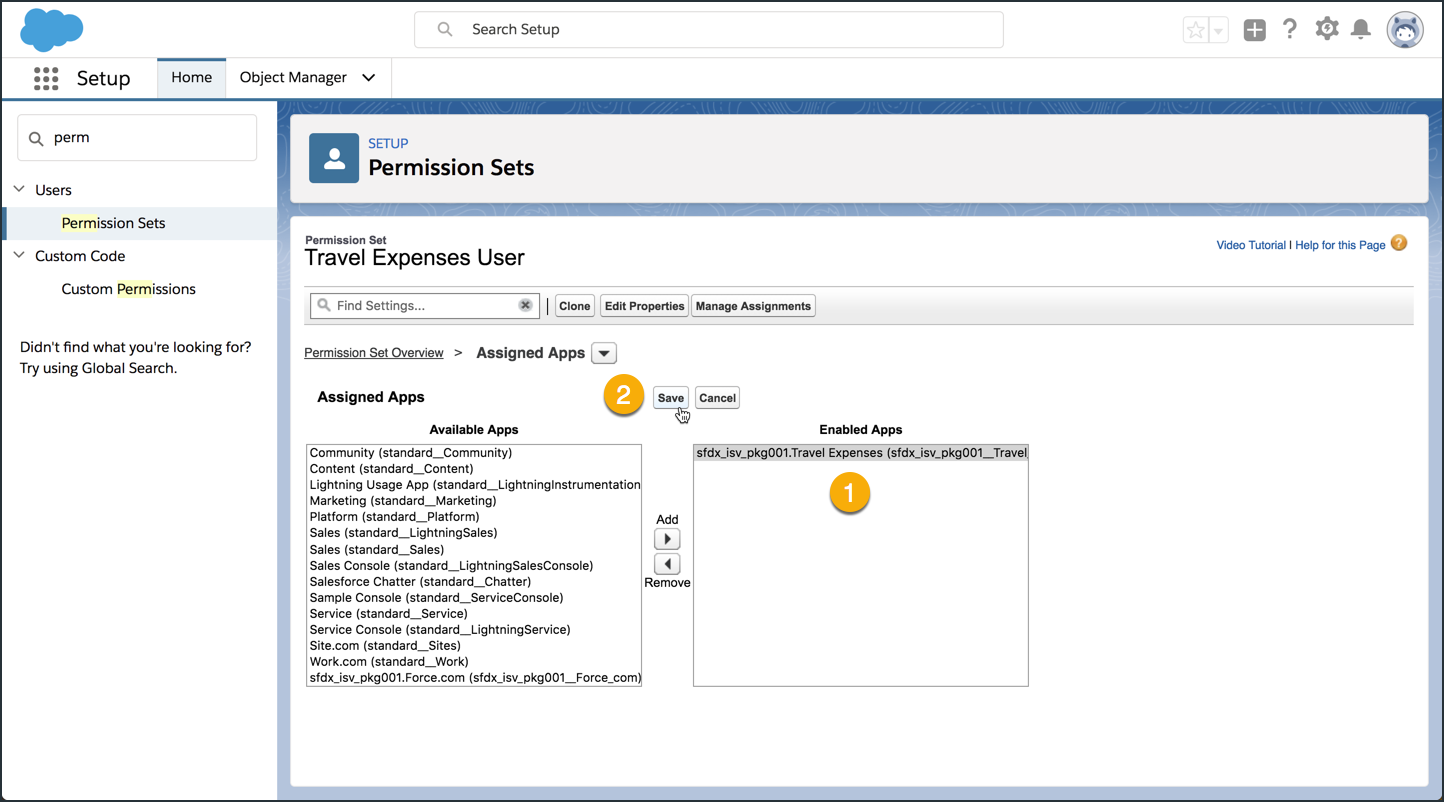
Step 4 of 6: Open the “Assigned Apps” settings page
- Type “app” into the search box.
- Click the Assigned Apps menu item.
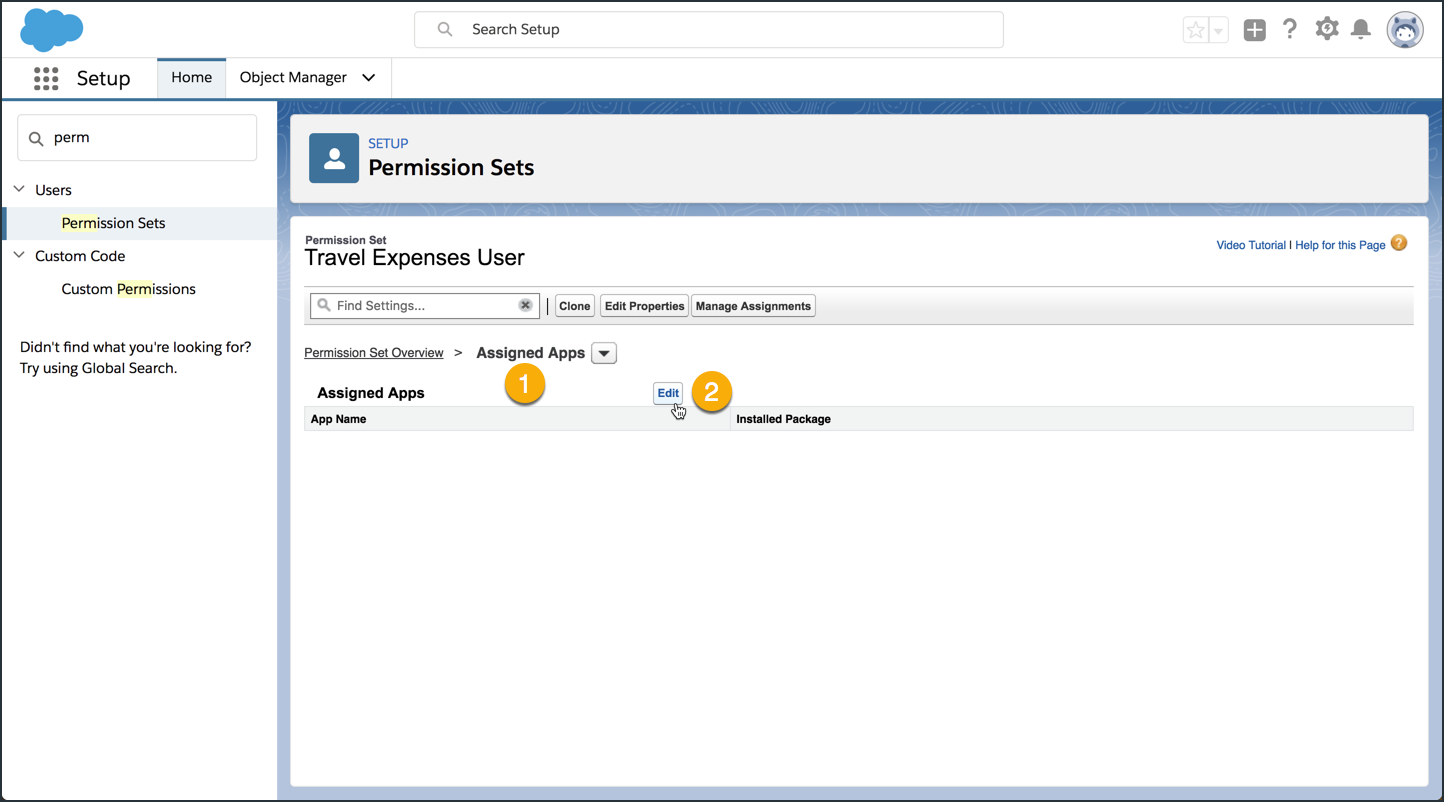
Step 5 of 6: Edit the “Assigned Apps” settings
- Make sure you’re in the Assigned Apps setup page.
- Click the Edit button.
Step 6 of 6: Specify your “Travel Expenses” app as an “Enabled App”
- Find the **Travel Expenses app in the list of Available apps and move it over to Enabled Apps.
- Click Save to continue.
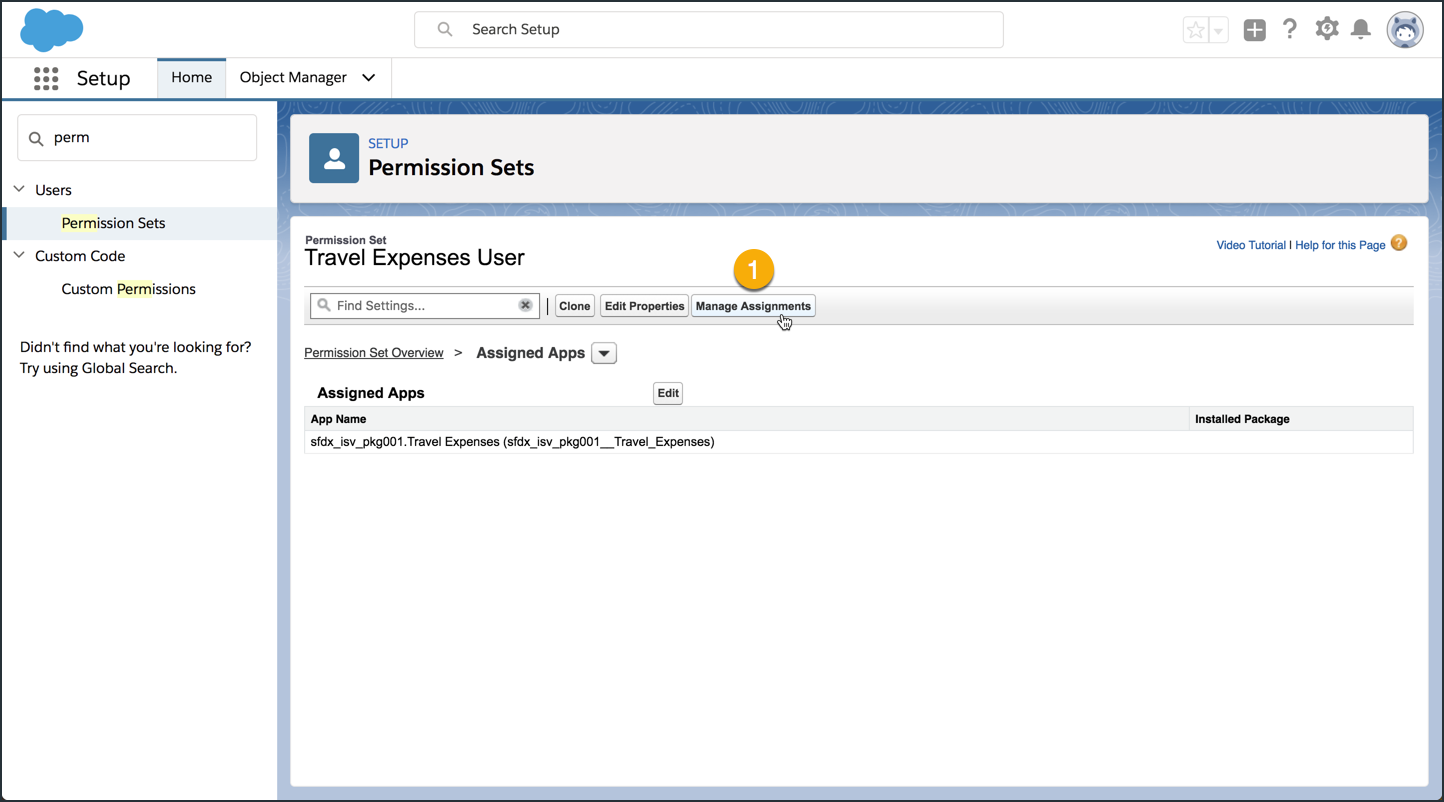
Assign the “Travel Expenses User” permission set to the admin user
Step 1 of 4: Click the “Manage Assignments” button on the “Travel Expenses User” permission set
- Click on the Manage Assignments button.
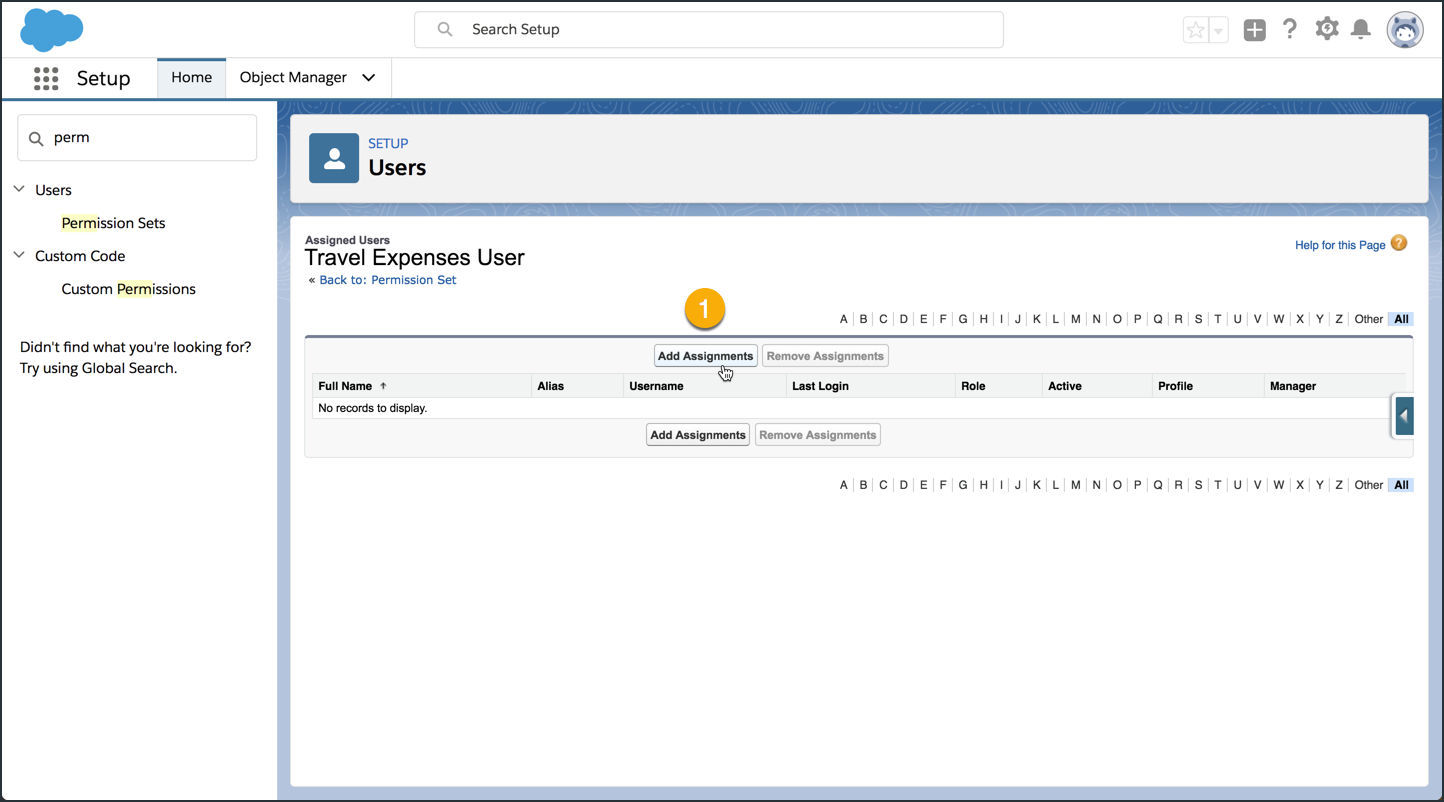
Step 2 of 4: Click the “Add Assignments” button
- Click the Add Assignments button.
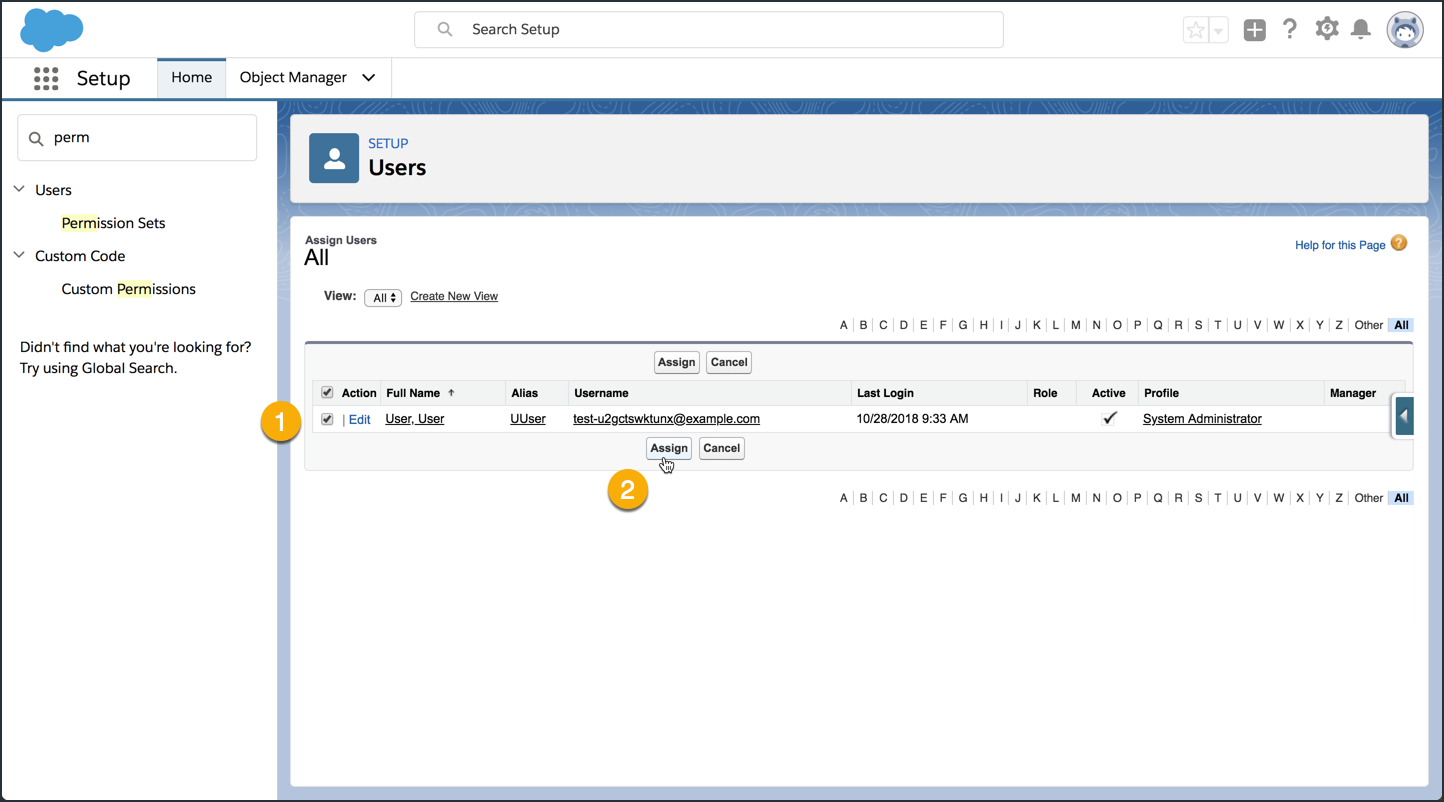
Step 3 of 4: Mark the Admin User (UUser) for assignment of this permission set
- Check the box next to the “User, User” user (that’s your admin user in this scratch org).
- Click the Assign button.
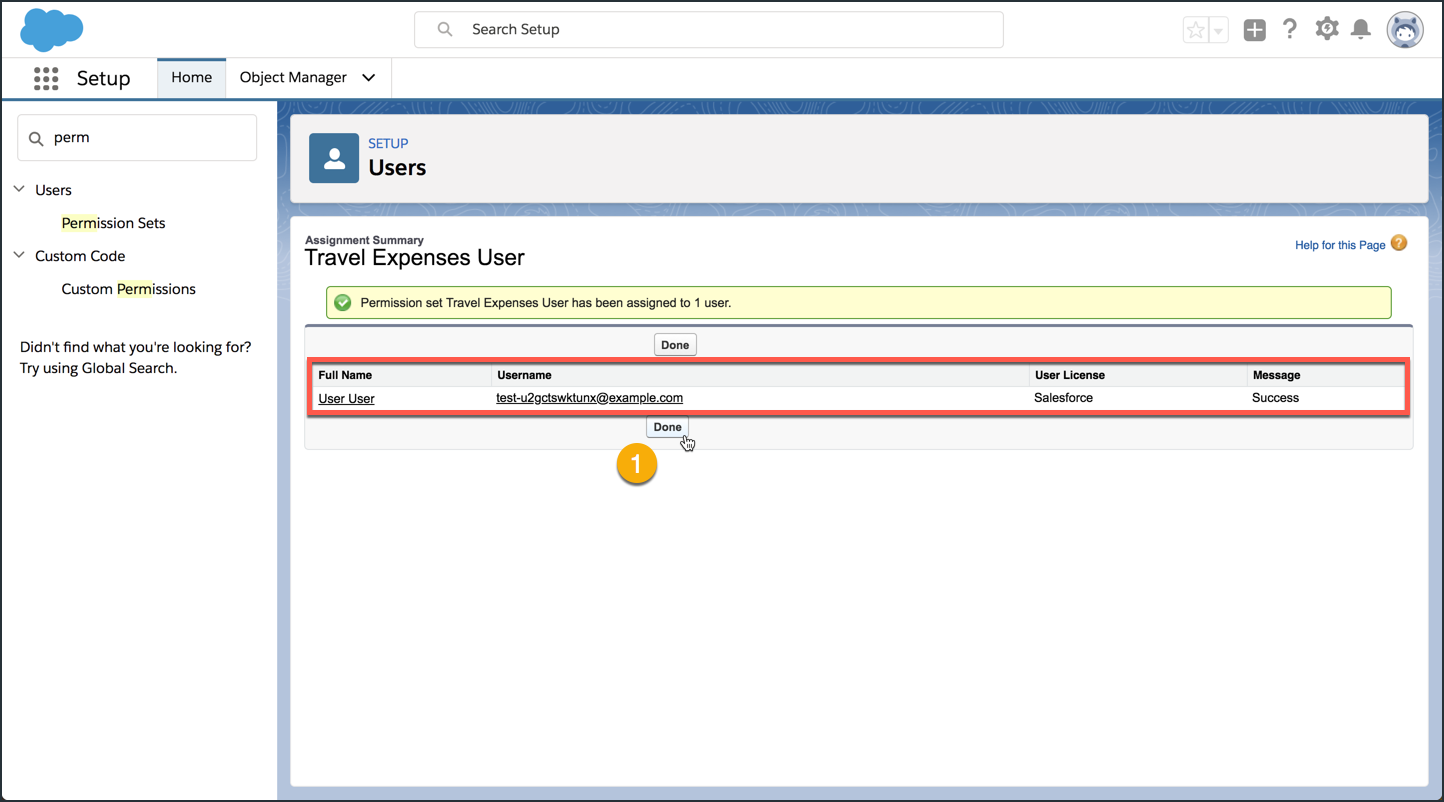
After assigning the permission set, your screen should look something like this:
- Make sure the permset was assigned with a message of Success.