Add Metadata Components to Your Package
In this exercise, you will…
- Open the settings page for your managed package
- Add metadata components to your managed package
Open the settings page for your managed package
While still inside your packaging org, do the following.
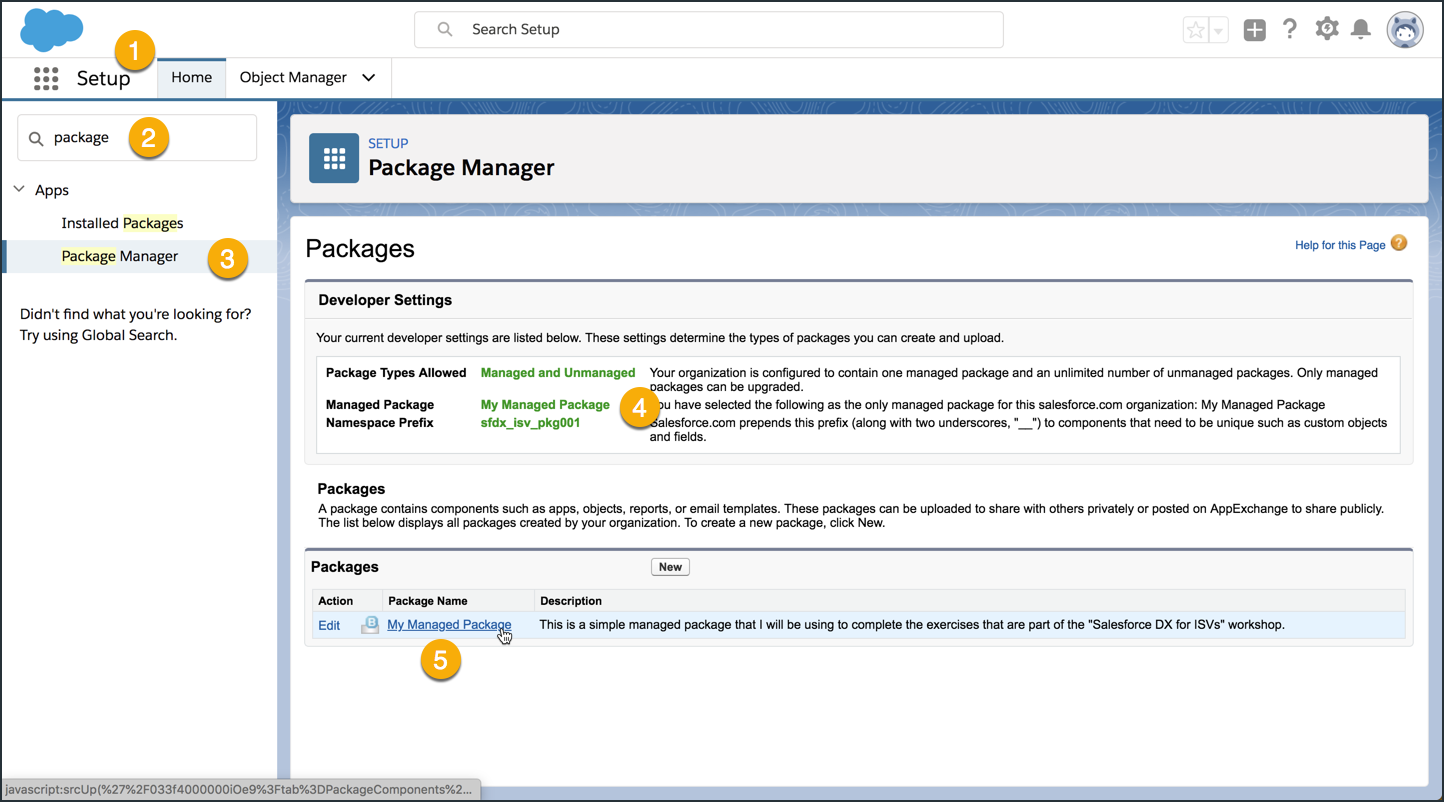
- Open Setup and click on the Home tab.
- Type “package” into the Quick Find search box.
- Click on the Package Manager setup item.
- Make sure that your packaging org has a Managed Package and Namespace Prefix listed here. Make note of both of these values as you will need to use them later.
- Click on your managed package to open up it’s setup page.
Add metadata components to your managed package
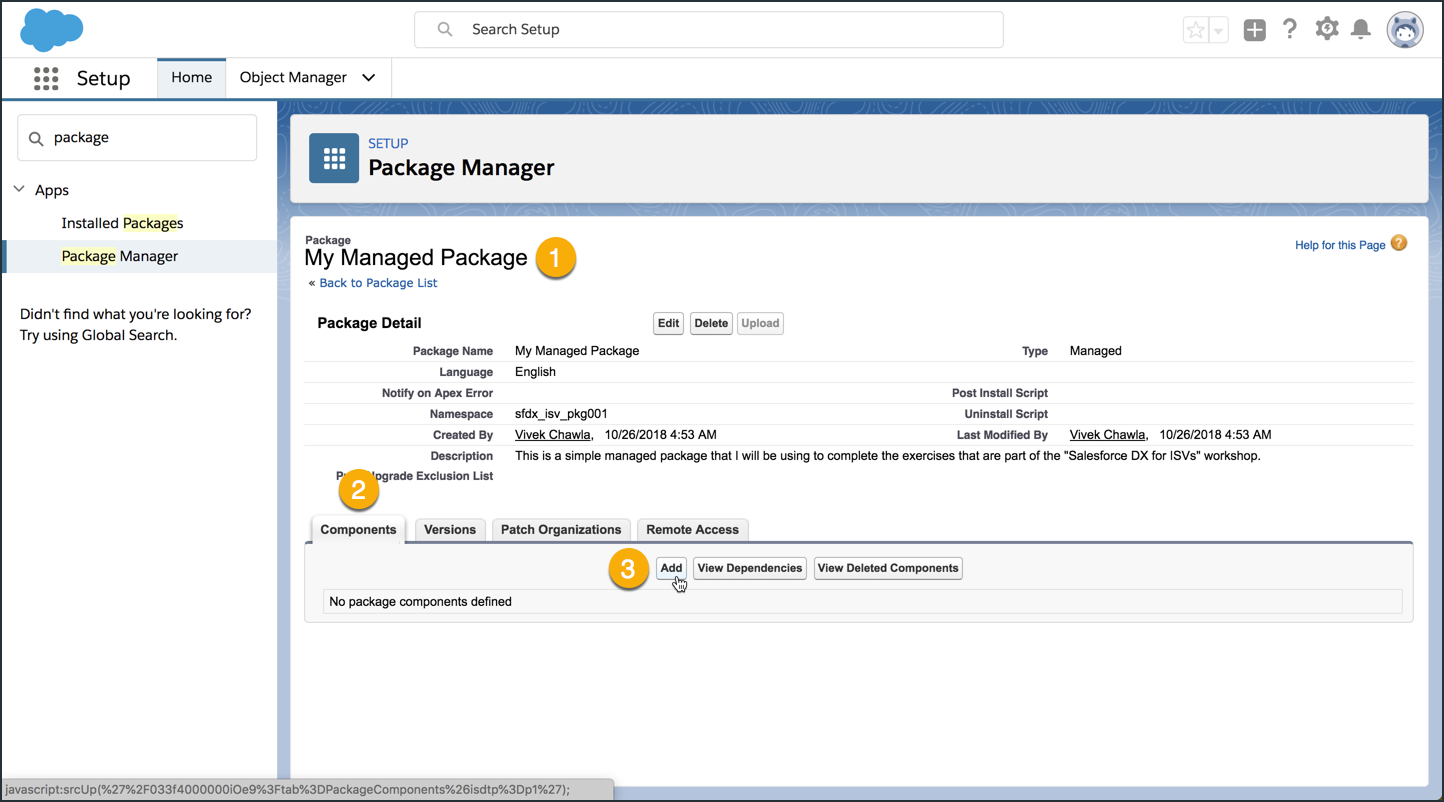
Step 1 of 2: Open the “Add to Package” page for your managed package
- Make sure you’re on the setup page for your managed package.
- Click on the Components tab.
- Click on the Add button
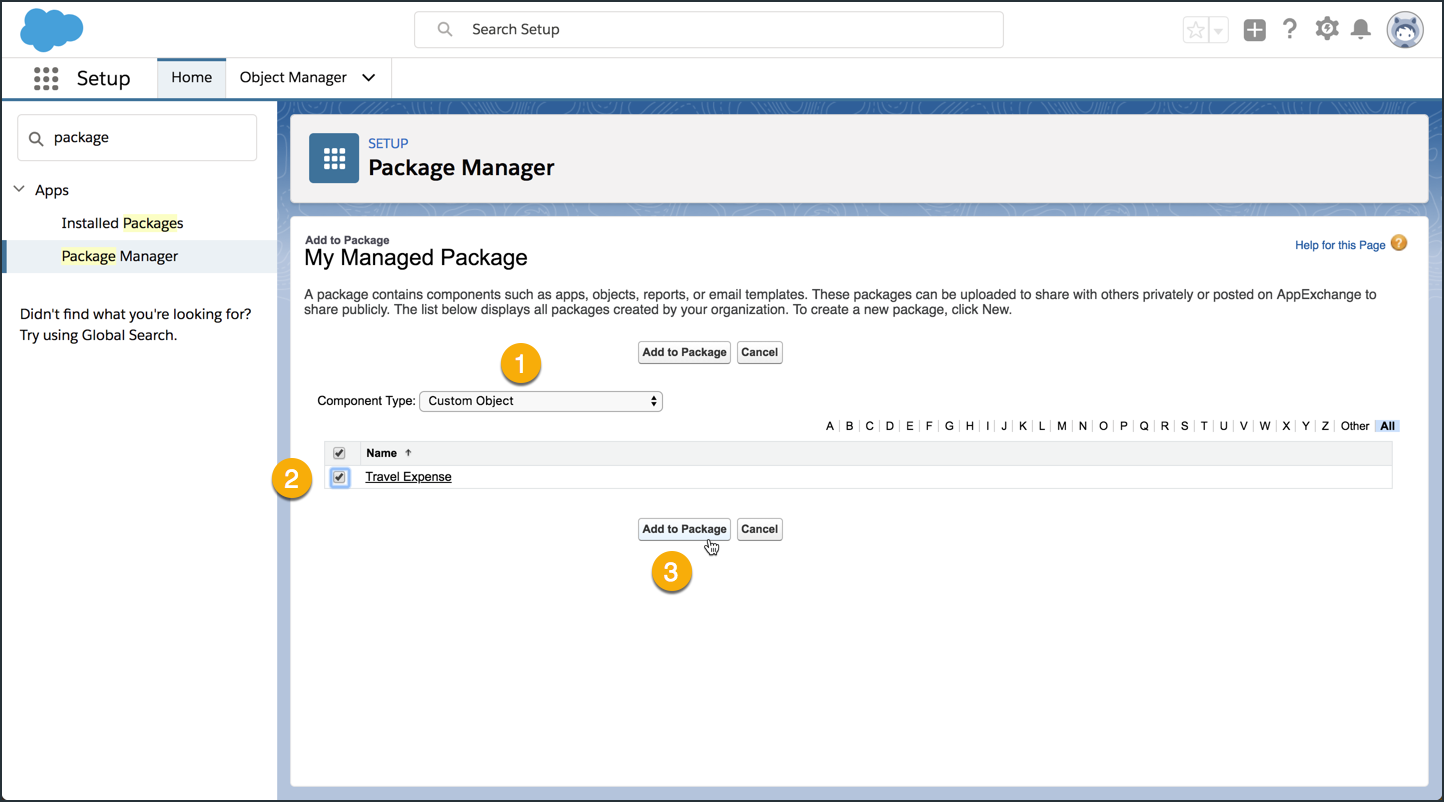
Step 2 of 2: Add the “Travel Expense” custom object component to your package
- In the Component Type dropdown, select
Custom Object. - Check the box next to
Travel Expense. - Click the Add to Package button.
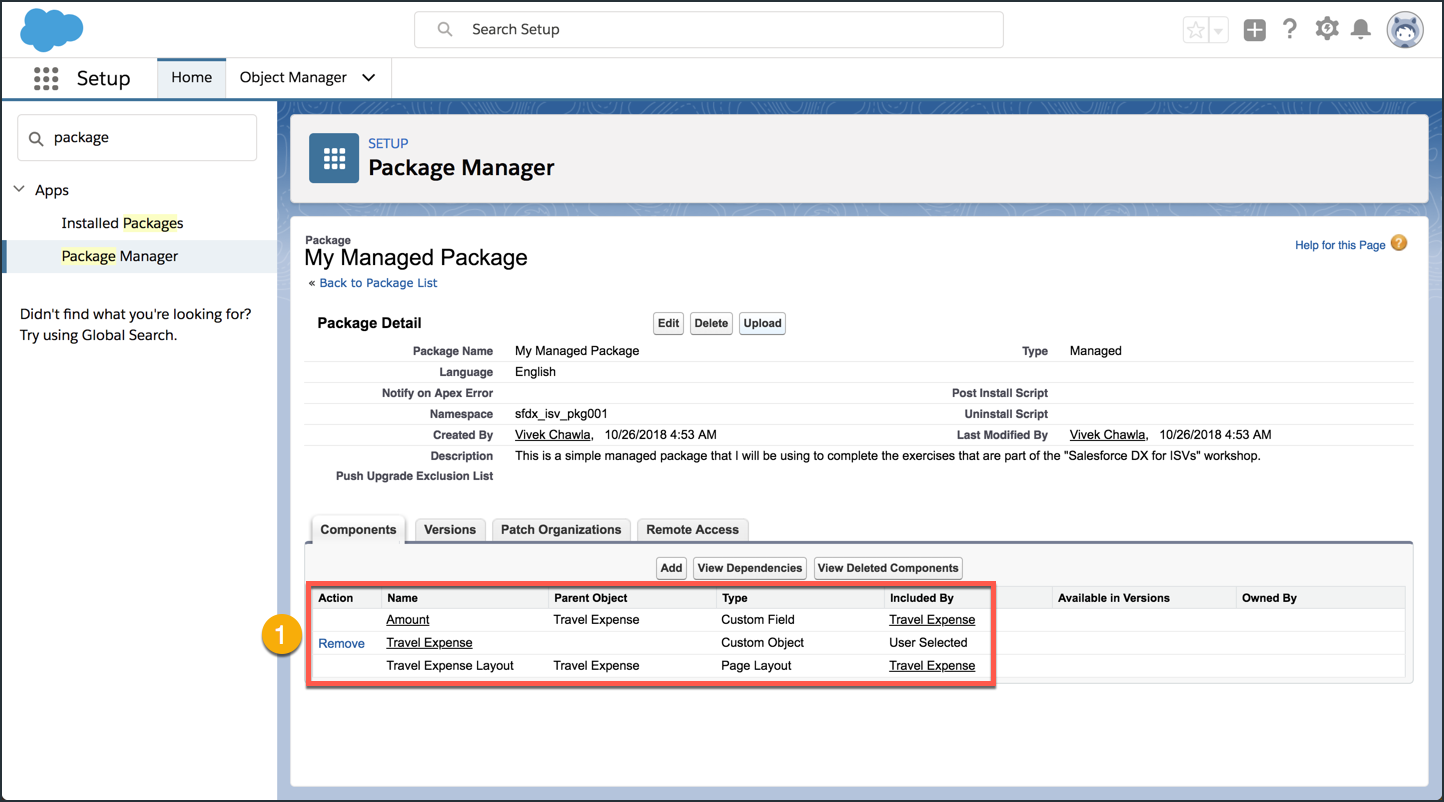
After adding the “Travel Expense” custom object component, your screen should look something like this:
- Make sure you have three metadata components. The Travel Expenses custom object, the Amount custom field, and the Travel Expenses Layout page layout.